MNISTデータのダウンロード
下記 key_file が示す4つの.gzファイルをダウンロードします。
import urllib.request
''' 手書き数字のMNISTデータベース '''
url_base = 'http://yann.lecun.com/exdb/mnist/'
key_file = {
    'train_img':'train-images-idx3-ubyte.gz',   # 学習用の手書きイメージ
    'train_label':'train-labels-idx1-ubyte.gz', # 学習用の正解ラベル
    'test_img':'t10k-images-idx3-ubyte.gz',  # テスト用の手書きイメージ
    'test_label':'t10k-labels-idx1-ubyte.gz' # テスト用の正解ラベル
}

print("実行ファイル:",__file__, url_base, "より取得")

for k,v in key_file.items():
    print(k,"のキーの",v, "をダウンロード!")
    urllib.request.urlretrieve(url_base+v, "./"+v)
MicroPythonで上記コードの一部を行う場合の例を示します。
import urequests
filename='t10k-images-idx3-ubyte.gz'
url = 'https://storage.googleapis.com/cvdf-datasets/mnist/'+filename
response = urequests.get(url)

with open(filename, "wb") as f:
    f.write(response.content) # テキストオープン時はresponse.text

response.close()
学習用データの準備
上記でダウンロードした train-images-idx3-ubyte.gz と train-labels-idx1-ubyte.gz から使いやすいデータ構造にして
x_train.pkl と t_train_a.pkl のファイルに保存し直している。
x_train.pkl と t_train_a.pkl のファイルに保存し直している。
import gzip
import numpy as np
image_size = 28 # 縦横の画素数 (28X28)=784画素
num_images = 60000 # 取得画像枚数
fimg = gzip.open('train-images-idx3-ubyte.gz','r')#画像データ
fimg.read(16) #メタ
buf = fimg.read(image_size * image_size * num_images);
fimg.close()
data = np.frombuffer(buf, dtype=np.uint8).astype(np.float32)
data = data.reshape(num_images, image_size * image_size)
data /= 255.0 # 0から1に正規化
print(type(data),data.shape) # <class 'numpy.ndarray'> (60000, 784)
on_hot_label= np.zeros((num_images, 10))
labels=[0]*num_images
flbl = gzip.open('train-labels-idx1-ubyte.gz','r')#正解ラベル
flbl.read(8) #メタ
for i in range(0,num_images):
buf = flbl.read(1)
numb = np.frombuffer(buf, dtype=np.uint8).astype(np.int64)
on_hot_label[i][numb[0]]=1
labels[i] = numb[0]
#print(labels, on_hot_label[i])
flbl.close()
print(type(on_hot_label),on_hot_label.shape) # <class 'numpy.ndarray'> (60000, 10)
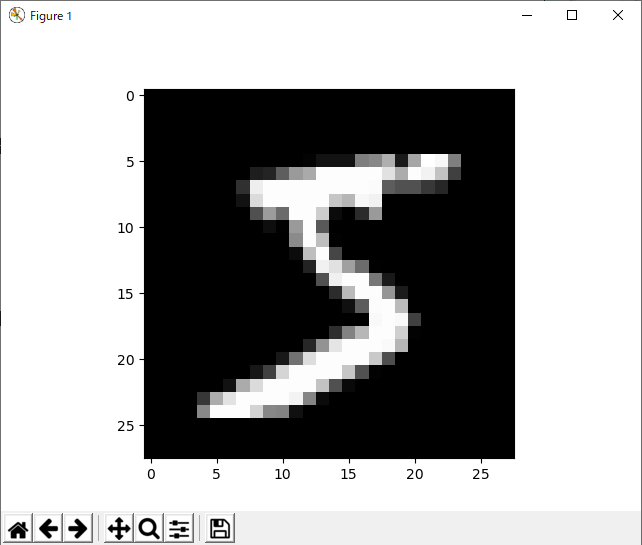
''' 画像の表示 '''
import matplotlib.pyplot as plt
while True:
idx=input("画像の添え字>>")
if idx == "": break
idx = int(idx)
plt.imshow(data[idx].reshape((28,28)), "gray")
print("ラベル:", labels[idx], "=" , on_hot_label[idx] )
plt.show()
# ラベル: 5 = [0. 0. 0. 0. 0. 1. 0. 0. 0. 0.]
#  ''' 保存 '''
import pickle
with open('x_train.pkl', mode='wb') as fw:
pickle.dump(data, fw) # 直列化 (Serialize) して保存
with open('t_train_a.pkl', mode='wb') as fw:
pickle.dump(on_hot_label, fw) # 直列化 (Serialize) して保存
''' 保存 '''
import pickle
with open('x_train.pkl', mode='wb') as fw:
pickle.dump(data, fw) # 直列化 (Serialize) して保存
with open('t_train_a.pkl', mode='wb') as fw:
pickle.dump(on_hot_label, fw) # 直列化 (Serialize) して保存
上記で保存した'x_train.pkl'を、data2にリストアする例を下記に示す。
上記で保存したデータは'numpy.ndarray'でしたが、以下ではそのデータ型も含めて復元しています。
#import numpy as np
import pickle

with open('x_train.pkl', mode='rb') as fr:
    data2 = pickle.load( fr ) # 復元する

print(type(data2), "\n", data2.shape)
'''
 <class 'numpy.ndarray'>
 (60000, 784)
'''
テスト用データの準備
上記でダウンロードした t10k-images-idx3-ubyte.gz と t10k-labels-idx1-ubyte.gz から使いやすいデータ構造にして
x_train.pkl と t_train_a.pkl のファイルに保存し直している。
x_train.pkl と t_train_a.pkl のファイルに保存し直している。
import gzip
import numpy as np

image_size = 28 # 縦横の画素数 (28X28)=784画素
num_images = 10000 # 取得画像枚数

fimg = gzip.open('t10k-images-idx3-ubyte.gz','r')#画像データ

fimg.read(16) #メタ
buf = fimg.read(image_size * image_size * num_images);
fimg.close()
data = np.frombuffer(buf, dtype=np.uint8).astype(np.float32)
data = data.reshape(num_images, image_size * image_size)
data /= 255.0 # 0から1に正規化
print(type(data),data.shape)   #  (60000, 784)

on_hot_label= np.zeros((num_images, 10))
labels=[0]*num_images
flbl = gzip.open('t10k-labels-idx1-ubyte.gz','r')#正解ラベル
flbl.read(8) #メタ
for i in range(0,num_images):
    buf = flbl.read(1)
    numb = np.frombuffer(buf, dtype=np.uint8).astype(np.int64)
    on_hot_label[i][numb[0]]=1
    labels[i] = numb[0]
    #print(labels, on_hot_label[i])

flbl.close()
print(type(on_hot_label),on_hot_label.shape)  #  (60000, 10)

''' 画像の表示 '''
import matplotlib.pyplot as plt
while True:
    idx=input("画像の添え字>>")
    if idx == "": break
    idx = int(idx)
    plt.imshow(data[idx].reshape((28,28)), "gray")
    print("ラベル:", labels[idx], "=" , on_hot_label[idx] )
    plt.show()

''' 保存 '''
import pickle
with open('x_test.pkl', mode='wb') as fw:
    pickle.dump(data, fw) # 直列化 (Serialize) して保存

with open('t_test_a.pkl', mode='wb') as fw:
    pickle.dump(on_hot_label, fw) # 直列化 (Serialize) して保存