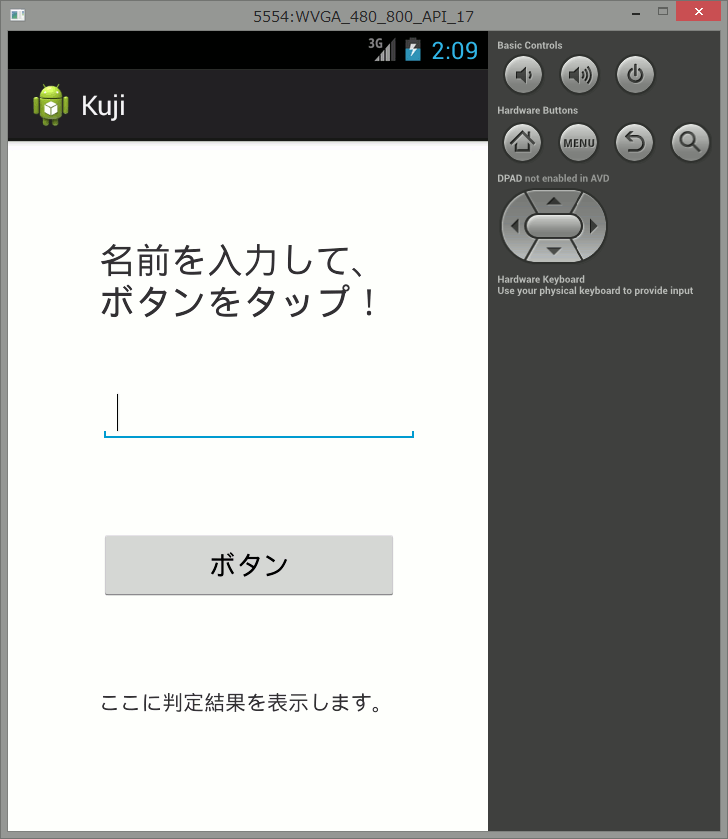
これは、ここで設定したレイアウトの名からこのファイル名が決まります。
このファイルをダブルクリックなどで開いた状態が下の図で、ここでメイン画面の部品配置の編集でGUIで変更できる状態です。
Package Exploerにあるappcompat_v7は新しいOSで使える機能の以前のバージョンのOSでも使えるようにしたライブライで自動的に追加されます。
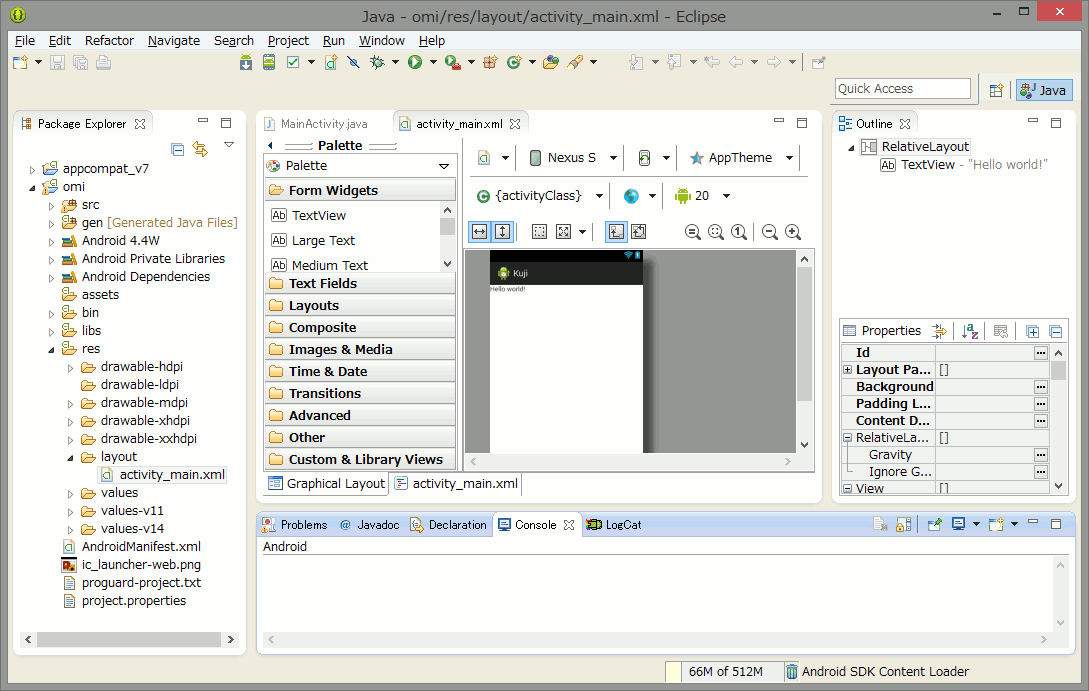
上メインの activity_main.xml タグをクリックすると、下のようにテクスト編集画面に変わります。
逆に下のGraphical Layout タグをクリックするとス、上のGUI編集画面に変わります。
(上と下のどちらの画面でも、activity_main.xmlのファイルを編集する画面で、一方の変更が他方に反映します。)
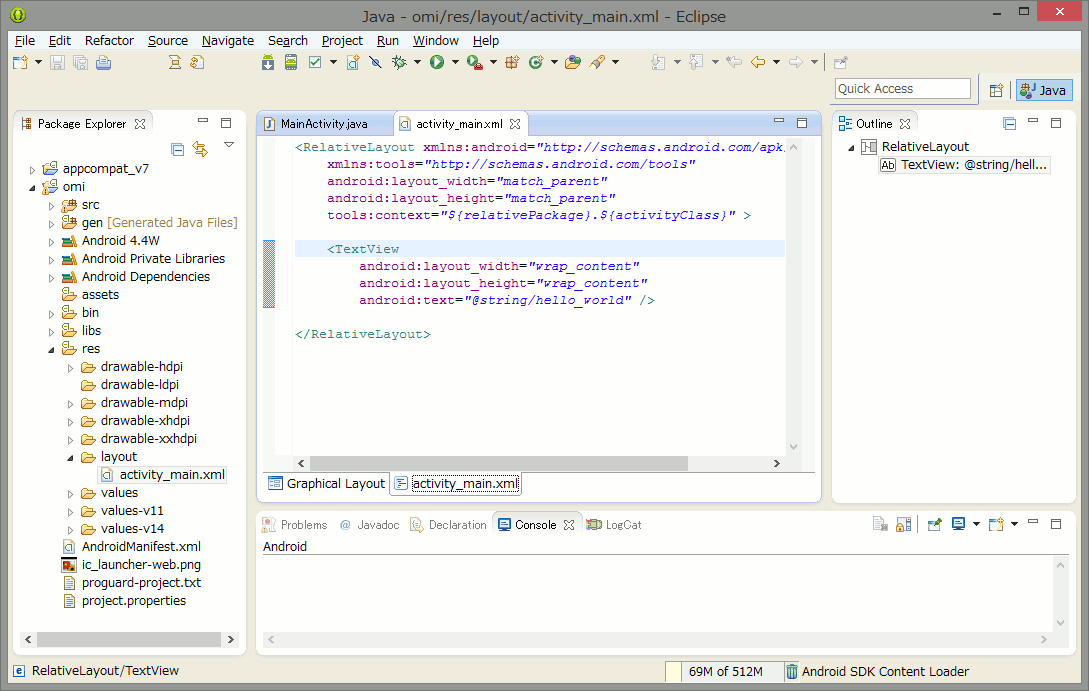
(XMLの補足説明)
『Graphical Layout』での配置移動と、XMLリソースファイルの内容連動
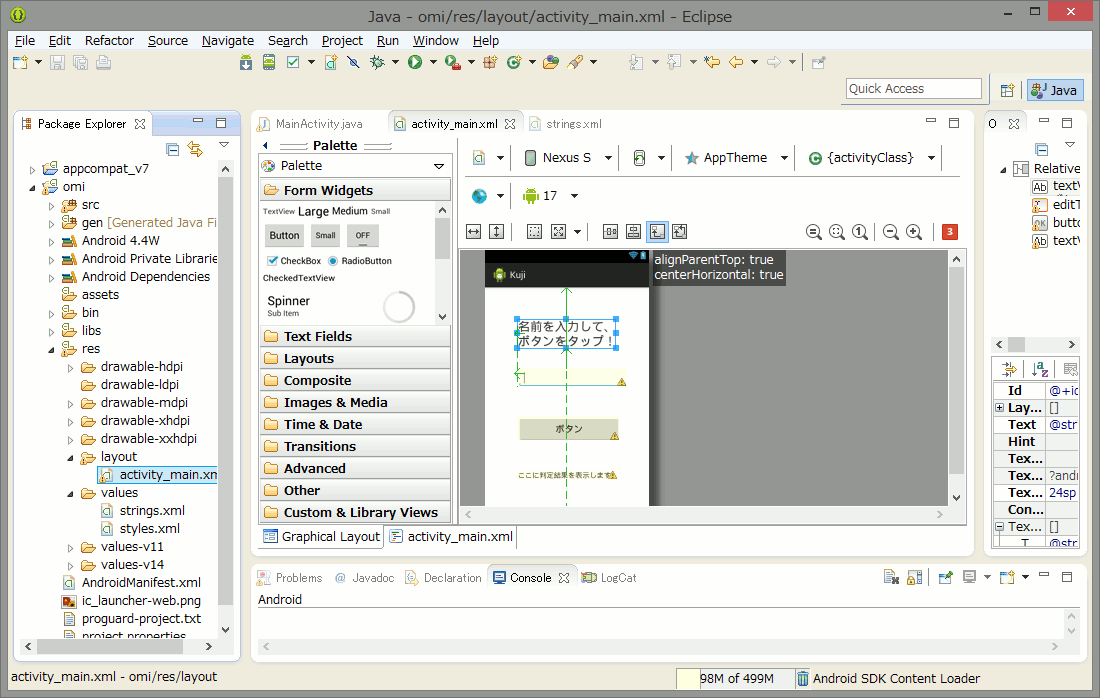
Graphical Layout タグを選択して、GUIで操作します。下は、初めに用意されていたTextViewを選択した後、ProperiesのtextSizeを24dp に設定します。
TextViewは、任意の文字列を配置するための部品です。
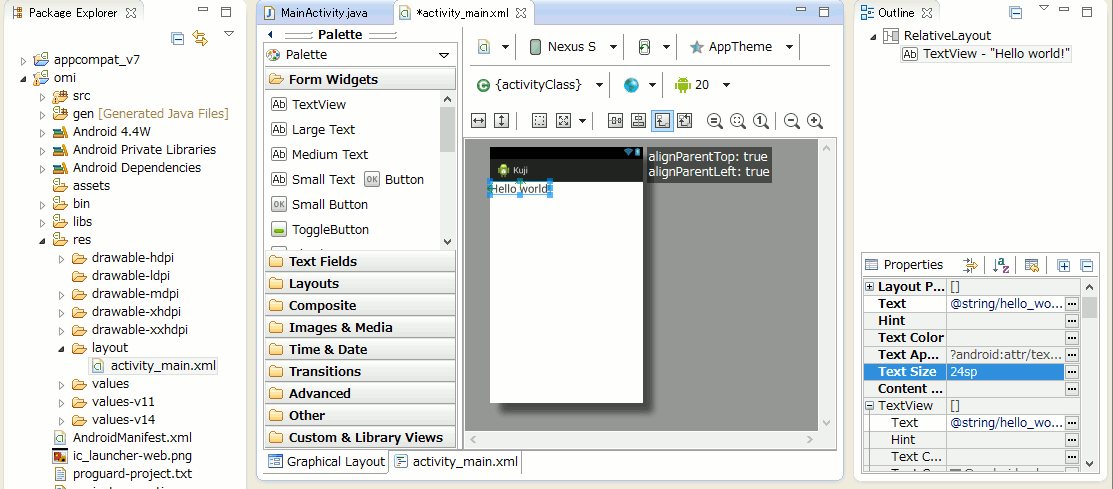
そしてこのの位置をドラックで変更している画面です。
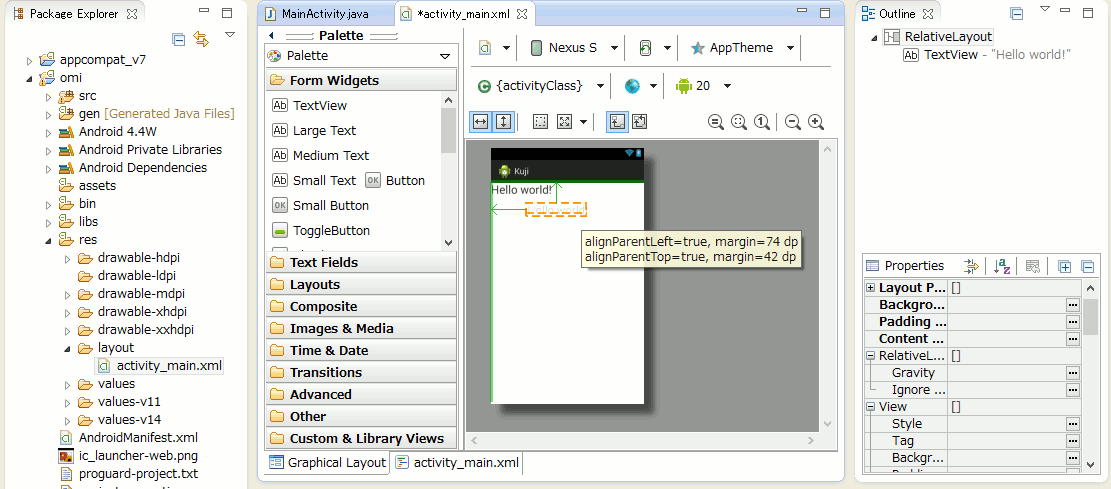
この変更は、activity_main.xmlに反映します。その例を下に示します。
<RelativeLayout xmlns:android="http://schemas.android.com/apk/res/android"
    xmlns:tools="http://schemas.android.com/tools"
    android:layout_width="match_parent"
    android:layout_height="match_parent"
    tools:context="${relativePackage}.${activityClass}" >

    <TextView
        android:layout_width="wrap_content"
        android:layout_height="wrap_content"
        android:layout_alignParentTop="true"
        android:layout_centerHorizontal="true"
        android:layout_marginTop="62dp"
        android:text="@string/hello_world"
        android:textSize="24sp" />

</RelativeLayout>
デフォルトはRelativeLayoutと呼ばれるレイアウトに。部品を配置するようになっている。この場合、レイアウトとの中に配置した部品は、「親()」と「子」の関係という構造になっている。
layout_centerHorizontal="true"は、水平方向の中央に配置する意味である。
layout_alignParentTopの指定で、親のRelativeLayoutの上部を基準にして、 layout_marginTop="62dp"により、TextViewの上部に62dpの空間ができるように配置される。
下位でここで使われる単位の意味をまとめる。 (Androidではdpかspの単位が推奨されています。)
| dp | dip と書いても同じで、密度非依存ピクセル(density-independent pixels)の意味です。 160ドット/inchのスクリーンで、1dp=1px とする目安です。必ずしも正比例ではありません。 |
| sp | Scale-independent pixelsで、これもスケール依存しない単位です。ユーザーの設定したフォントで1spの値が変わります。 |
| px | ピクセルと呼ぶ。 スクリーン上のドット数で指定するサイズ |
| mm | ミリの定規サイズ。 |
| in | インチの定規サイズ。 |
| pt | ポイントで、インチ定規のの1/72サイズ。 約 0.3527ミリ単位 |
続けて、TextFields内の Plain Text ドラックして配置しているのが下のイメージです。
API 20 (Android 4.4W:google wear用のAPI)にはedittextなどのwidgetがない。 また、API 20をSDK managerを入れた状態でrendering方法にAutomatically pick bestを選択すると API 20が利用されてしまう。
『この時、Exception raised during rendering: java.lang.System.arraycopy([CI[CII)V』の不具合が生じる。
対策として、Automatically pick bestを解除し、下のAPI 17を選択しているようにAPI 20以外を利用しなければならない。
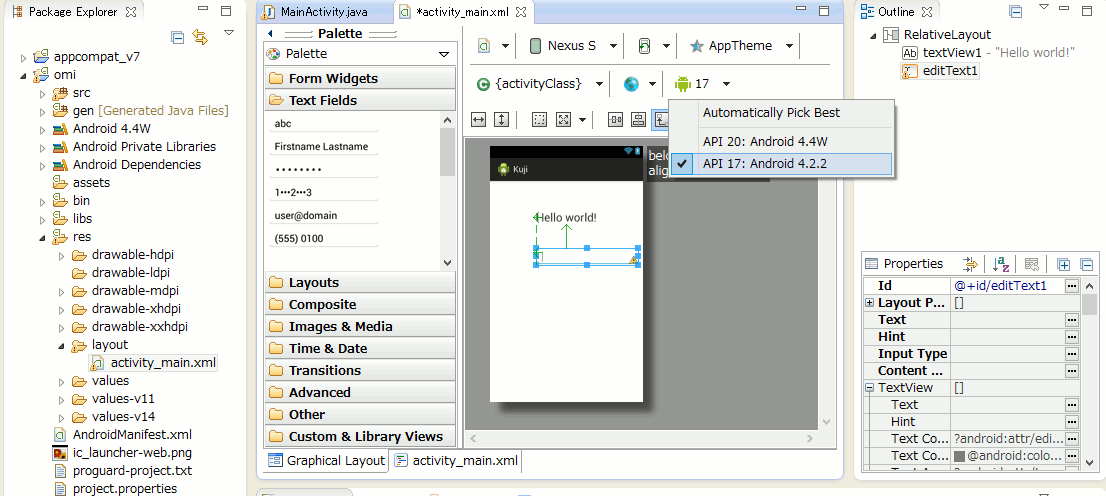
デフォルトであるレイアウトのRelativeLayoutでは、先に配置してある近い部品を基準に配置される。
この場合は、先に配置したTextViewを基準している。(この時点で自動的に各部品にidが設定される。)
ドラック中は、配置をアシストする線が出現します。(TextViewの左端からと、下からを基準に配置していることになる。)
この変更は、activity_main.xmlに反映します。その例を下に示します。
<RelativeLayout xmlns:android="http://schemas.android.com/apk/res/android"
    xmlns:tools="http://schemas.android.com/tools"
    android:layout_width="match_parent"
    android:layout_height="match_parent"
    tools:context="${relativePackage}.${activityClass}" >

    <TextView
        android:id="@+id/textView1"
        android:layout_width="wrap_content"
        android:layout_height="wrap_content"
        android:layout_alignParentTop="true"
        android:layout_centerHorizontal="true"
        android:layout_marginTop="62dp"
        android:text="@string/hello_world"
        android:textSize="24sp" />

    <EditText
        android:id="@+id/editText1"
        android:layout_width="wrap_content"
        android:layout_height="wrap_content"
        android:layout_alignLeft="@+id/textView1"
        android:layout_below="@+id/textView1"
        android:layout_marginTop="50dp"
        android:ems="10" >

        <requestFocus />
    </EditText>

</RelativeLayout>
ドラックによって基準となる部品が変化する。上記の例ではEditTextが、layout_alignLeft="@+id/textView1"の設定で、 "@+id/textView1"のidを付けたTextViewの左端を基準に配置され、
layout_belowのlayout_below="@+id/textView1"の設定で 、"@+id/textView1"のidを付けたTextViewの下を基準に配置される。
この位置は layout_marginTop="50dp"で、TextViewの下に50dpの空白ができるように配置される。
左からの位置は (なお、android:ems="10"は、editText1のサイズを指定するもので、1が1文字を意味する。)
Buttonをドラックで配置します。そして、そのボタンのクリックで選択状態にして、 右のPropertiesウインドウで、Textの項目を「Button」からカタカナの「ボタン」に変更します、
その操作のイメージが次のイメージです。
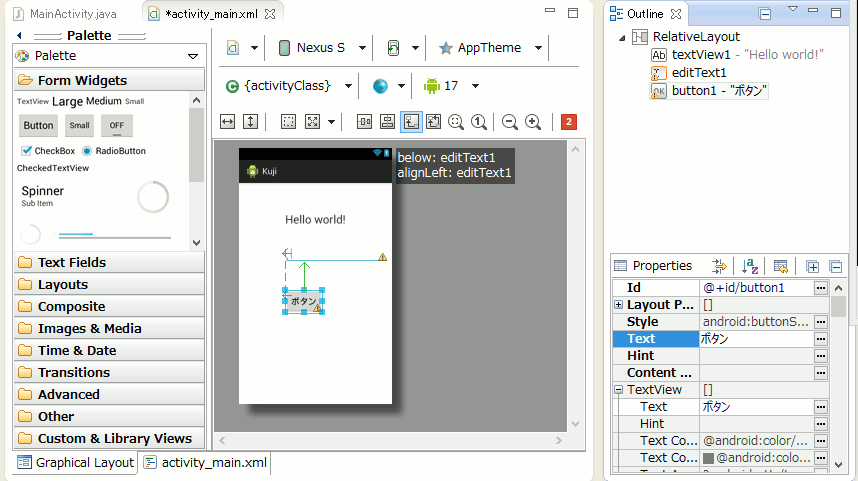
Propertiesウインドは選択中の部品の設定に使います。
なお配置した部品を指定する場合、視覚的に見えている部品をクリックして選択する以外に、 Propertiesウインドウの上に位置するを指定する場合、Outlineのウインドウで、button1(idの名前)の所を選択しても構いません。
以下は、そこを選択して「Min Width」を200dp にしている例です。
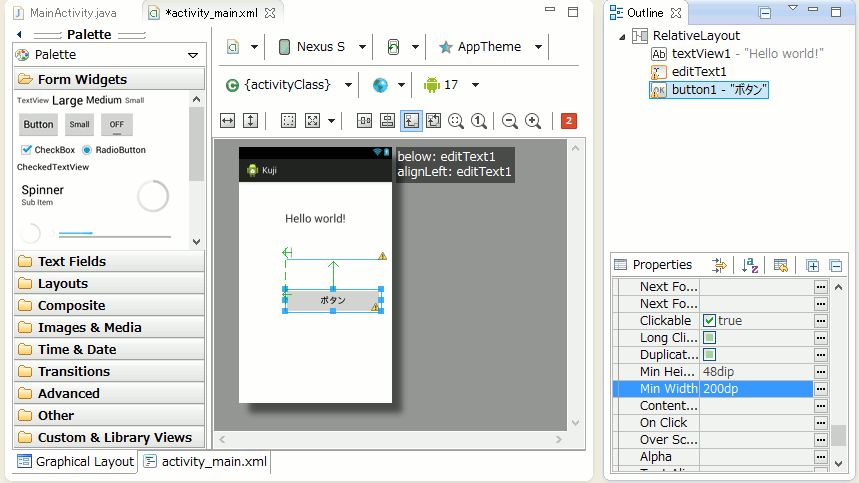
この時のactivity_main.xmlの内容は、次のように連動します。
<RelativeLayout xmlns:android="http://schemas.android.com/apk/res/android"
    xmlns:tools="http://schemas.android.com/tools"
    android:layout_width="match_parent"
    android:layout_height="match_parent"
    tools:context="${relativePackage}.${activityClass}" >

    <TextView
        android:id="@+id/textView1"
        android:layout_width="wrap_content"
        android:layout_height="wrap_content"
        android:layout_alignParentTop="true"
        android:layout_centerHorizontal="true"
        android:layout_marginTop="62dp"
        android:text="@string/hello_world"
        android:textSize="24sp" />

    <EditText
        android:id="@+id/editText1"
        android:layout_width="wrap_content"
        android:layout_height="wrap_content"
        android:layout_alignLeft="@+id/textView1"
        android:layout_below="@+id/textView1"
        android:layout_marginTop="39dp"
        android:ems="10" >

        <requestFocus />
    </EditText>

    <Button
        android:id="@+id/button1"
        android:layout_width="wrap_content"
        android:layout_height="wrap_content"
        android:layout_alignLeft="@+id/editText1"
        android:layout_below="@+id/editText1"
        android:layout_marginTop="57dp"
        android:minWidth="200dp"
        android:text="ボタン" />

</RelativeLayout>
XMLリソースファイルのテキスト編集で配置 (『Graphical Layout』の連動確認)
上記のactivity_main.xmlファイルを直接に編集して部品を追加することもできます。以下では、TextView を最後にテキスト編集で追加配置してます。
idを指定する場合は、@+id/の直後でユニークな名前を付けて記述します。
<RelativeLayout xmlns:android="http://schemas.android.com/apk/res/android"
    xmlns:tools="http://schemas.android.com/tools"
    android:layout_width="match_parent"
    android:layout_height="match_parent"
    tools:context="${relativePackage}.${activityClass}" >

    <TextView
        android:id="@+id/textView1"
        android:layout_width="wrap_content"
        android:layout_height="wrap_content"
        android:layout_alignParentTop="true"
        android:layout_centerHorizontal="true"
        android:layout_marginTop="62dp"
        android:text="@string/hello_world"
        android:textSize="24sp" />

    <EditText
        android:id="@+id/editText1"
        android:layout_width="wrap_content"
        android:layout_height="wrap_content"
        android:layout_alignLeft="@+id/textView1"
        android:layout_below="@+id/textView1"
        android:layout_marginTop="39dp"
        android:ems="10" >

        <requestFocus />
    </EditText>

    <Button
        android:id="@+id/button1"
        android:layout_width="wrap_content"
        android:layout_height="wrap_content"
        android:layout_alignLeft="@+id/editText1"
        android:layout_below="@+id/editText1"
        android:layout_marginTop="57dp"
        android:minWidth="200dp"
        android:text="ボタン" />

    <TextView
        android:id=@+id/"@+id/textView2"
        android:layout_width="wrap_content"
        android:layout_height="wrap_content"
        android:layout_alignLeft="@+id/button1"
        android:layout_below="@+id/button1"
        android:layout_marginTop="57dp"
        android:text="ここに判定結果を表示します。" />

</RelativeLayout>
これは、『Graphical Layout』に切り替えると次のように反映しているのが確認できます。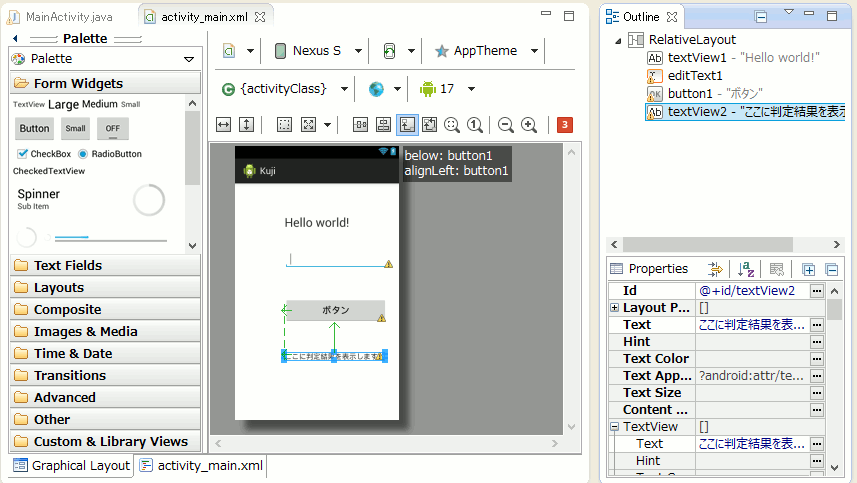
これをプログラムで行った例は、ここで参照できます。
